It occurred to me recently that, since not everybody is crazy enough to try building a boat in their backyard, I should provide some description as to what goes into a project like this. Also I have been feeling guilty since I have been too busy recently to put some work time in on the boat so I figured I will do the next best thing and blog about working on the boat. I should start off by saying that a much better, more in depth description than I could ever give can be found on this great website, http://spirainternational.com/hp_free.html for anybody interested in learning more. Here in I will give just a general idea of what is going to be taking place in my back yard over the next month or two.
Boats have been built for thousands and thousands of years by man, and the construction methods are as varied as the marine life on a coral reef, but a few general types of construction are as follows. First would be what is commonly referred to as a ‘dug out’ or ‘dugout canoe.’ This is basically a tree trunk that has been chopped down and hollowed out using an axe or axe like tool. Many native peoples made dug outs especially those that lived adjacent to navigable water ways but these crafts were limited to the size of the available tree trunks in the environment. A more sophisticated form of boat construction is the outrigger, or double hulled canoe, which are basically two canoes in parallel linked by struts in between. These boats are extremely stable and can be quite large. The Polynesian people used these types of boats to populate the many hundreds of islands in the South Pacific Ocean and may have even used them to travel to the western coast of South America! The next type of boat construction is one that most euro-centrally minded people will think of when you say “I am building a wooden boat!” This is called lapstrake construction, or plank on frame construction. This is ‘yea-olde times’ kind of boat construction which includes laying out rib frame components and attaching planks of wood to them (and to say that is an over simplification is like saying the pyramids were built by piling some rocks on top of each other). Lapstrake construction has been used for centuries and is still used today for wooden boats, the problem is that it requires quite a bit of high quality wood (which is very costly) as well as a crazy head for math (which despite my copious amounts of education still eludes me). Obviously none of these kinds of construction methods are the ones I am using for my boat.
 I think that if you were a yacht-y boat snob type you might say I was cheating, I say I am employing exciting and new innovative modes of small boat construction by building what is called a ply-
 on-frame construction method. Basically this boat consist of rib frame elements (made out of 2x4 planks) held together by a ‘keelson, chine logs, and sheer clamps’ all skinned in ½ inch plywood, fiberglass, epoxy, and in my case a Kevlar cloth bottom; now, when I first read the words ‘keelson, chine logs, and sheer clamps’ I said to myself, “Self, what the heck is a keelson, chine log and sheer clamp?” Well it is actually pretty simple, as you can see by the picture to the side the rib sections make up the vertical elements, or skeleton, of the boat whereas the keelson (in the middle) the chine logs (on the left and right bottom) and the sheer clamp (left and right top of the boat) make up the longitudinal elements of the boat structure that hold the ribs together. You also might notice that everything looks a little upside down, that is because it is, all the outer hull components (ribs, keelson et al, ply-wood, and fiberglass) are assembled upside down on what is ref
 erred to as a ‘strong back jig’ which helps align everything and keep it straight. The first major stage of construction is getting all the ribs in place and attached to the horizontal elements.
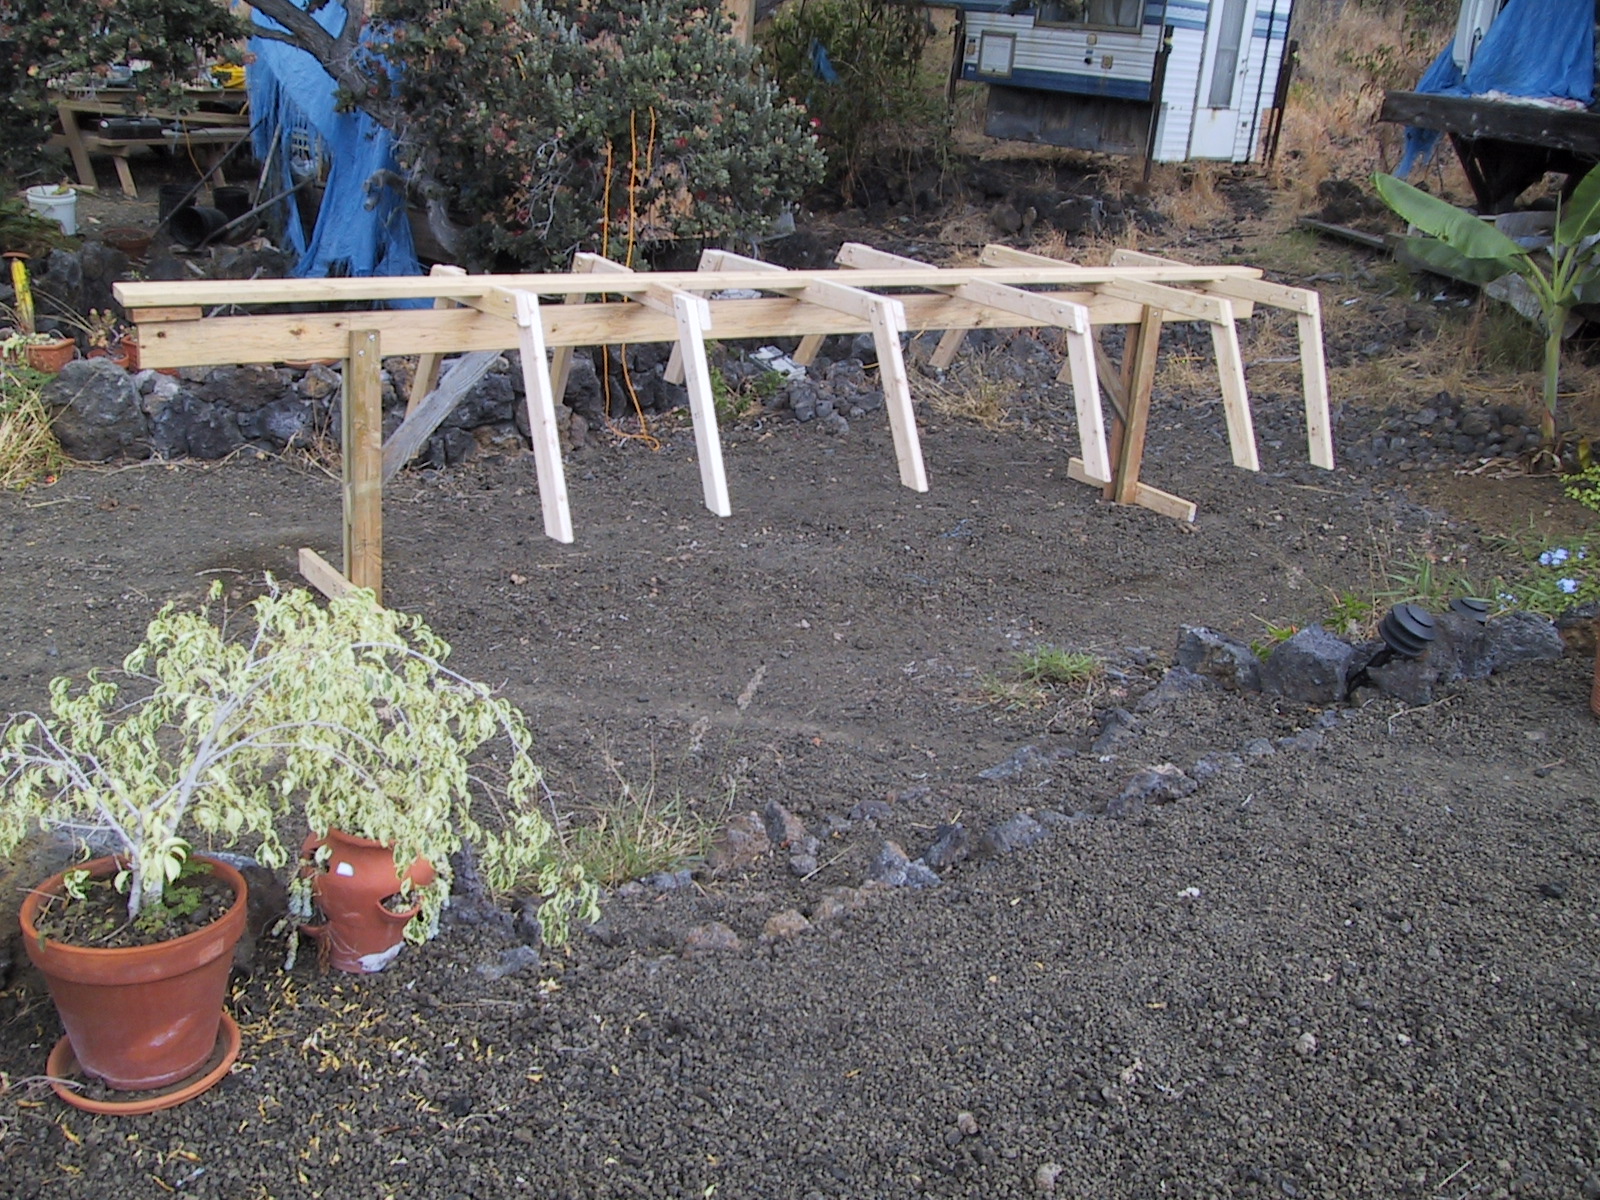 The next step in assembly is to skin the boat in ply-wood. This is all pretty straight forward mostly holding t
 he ply-wood sheets in place long enough to trace out the shape of each section and then I get to play with my new jig saw! Seriously though, power tools are NOT TOYS, (but if you can manage not to cut your thumb off they sure are fun). After a whole lot of shaping and shimmying into place (since all of the ply-wood has to sit flush on the rib sections) the ply-wood is glued and screwed into place and the glue is left to cure. Once the ply-wood is secured in place it is time to carefully shmear a whole bunch of epoxy over fiberglass cloth that has been laid out over the hull a couple of times (I am doing two coats of fiberglass on my boat). At this point you have the option of leaving the fine wood finish showing OR throwing an awesome paint design down on the hull which I think I will attempt. Either way after everything is cured and dried the boat is flipped over and a coat of wood finish, epoxy, and paint if desired, is applied to the inside of the hull. And FINALLY, after all that the construction of seats, oar-locks, storage compartments, well gussets, motor mounts, and other accoutrements can start!
Again I must emphasize that I am by far not an expert at this, only an over zealous enthusiast. So, if you get it in your head to build a boat I strongly urge you to DO YOUR HOMEWORK, read up on what you are getting into and be sure you are ready for the unbearable derision of your loved ones for taking on such a preposterous hobby!
A great boat building resource! check out the link to the side for more really intereseting info!
No comments:
Post a Comment